Welcome aboard the EM train. In the past, many new and long time writers would annoy me with silly questions like; How do I post something? What’s a split post? How do I use tags in articles? I would get frustrated and say, “it’s easy, just figure it out,” and then the response to that would be, “I wouldn’t ask these silly questions if you would only provide a simple guide to using your stupid site!” Well, I’ve heard you, your prayers have been answered. Here is the official guide to posting on EclipseMagazine.com.
I. LOGIN
1. Go to the EM Login screen by typing http://eclipsemagazine.com/wp-admin
2. Type your Username and Password.
3. Click the Login Button
II. Dashboard
1. After you login to the site, you will see the Dashboard Page.
2. Click the New Post Button located at the top right of the screen.
III. Posting Articles
1. Clicking the New Post button brings you to the New Post Screen. When working in the Admin area it’s always a good idea to Click the Save Draft Button every few minutes.
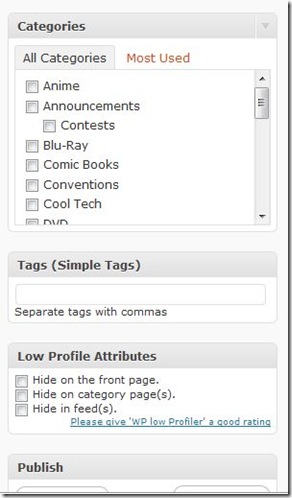
2. The New Post screen is divided into several different areas, you have an Headline Box and The Main Article Box in the center. On the right hand side are the Article Attribute selections, which are – Categories, Tags, and Publishing. Before you start posting articles, the first thing you should do is set up your workspace for the EM writing flow. All the Menu Items/Boxes are moveable. Just click a box and drag it to where you want it to go. The proper order for the right menu should be – Categories, Tags (Simple Tags), Publish, and Low Profiler. There are a couple of duplicate boxes, notably – Tags and Sticky Post. Be sure to use the box called Tags (Simple Tags) and do not use the sticky post box, I’ll explain how to make a post stay at the top later (this is a feature that only I should use or ASK before you use it).
3. Type the heading of your Article in the Heading Box (The first box) – The Heading format should be CATEGORY NAME: Headline Title. I.E. TELEVISION REVIEW: Battlestar Galactica is the bestest.
4. The body is where you will type the Article.
5. Use the Formatting menu to format your Article. You can add bullets, links, format your text, etc… Please split your Post, do not go over 150 words for homepage text. The Split Post icon is located on the far right corner of the menu bar. Tip – if you scroll your mouse over each icon the label will appear.
Split Post (Read More) Icon
6. Insert Image – Every post should have at least one image in the article before you split the post. To insert an Image, click the Insert Image Icon.
- When you click the Insert Image icon, a pop up winder will appear. Select the use Browser Uploading option. This will let you Add media files from your computer. Click the Browse Button, this will bring up your file system, selection your image and then click the Upload button.
- The Add Image screen will appear after you click the Upload button. When selecting an image always use the best possible image and size. Do not use grainy, out of focus, poorly scaled or thumbnail sizes for your images. It makes your article look unprofessional. Again, for now, all Articles Must include an Image. Use Google Image Search or a site like Flickr to find an appropriate image. Do not post an article that doesn’t include one.
- On the Add an Image screen, type the Title of the Image in the Title Box. Try and label the Image whatever the Subject is and not the Image file name. So this particular image would be called Michael Jackson and Cher, not chermichaelj. Captions have a tendency to mess certain functions up, so DON’T use the Caption option. You can use the Description box, but it’s kind of pointless, the same goes with the Link URL. The Alignment box should always be set to None. We do not want the text to wrap. If you want to center a photo, Highlight the photo After it’s inserted and use the Center command in the Formatting Menu.
- For the Image Size, use your best judgment, but try never to go over 400 for the width of the image it throws off the entire design.
- When you are done, click the Insert Into Post Button. The Image is now inserted into the post. Click the Image and drag the handle bars to resize it, or use the formatting menu if you want to set the alignment to be Left or Center.
IV. Adding Attributes (Categories, Tagging, etc.)
Ok, this is the part of Posting an Article that confuses almost everyone. So I’m going to attempt to spell it out here.
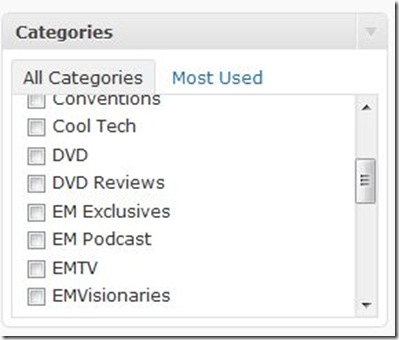
1. Categories – When we first migrated Eclipse over to WordPress from Drupal, we went a little category crazy. There are almost 100 current categories listed in the Category box. We need to get these back under control. Unfortunately I can’t easily collapse or rename these categories. So we’re sort of stuck with them. ONLY USE the following top level categories (Do not cross post, it hurts our Search Engine Rankings – The only exception to this rule is Movie Reviews, I have plans for that category and we have several partners who look up our movie reviews using that category):
- Movies
- Television
- DVD
- Blu-ray
- Video Games
- Hollywood Insider (All and Only interviews go here)
- Television and
- Cool-Tech
Anything else should be tags – ie Television Reviews, Television News, etc. DO NOT use the ANNOUNCEMENT category that is a category meant strictly for site related announcements. DO NOT use the FEATURES category, that is a dead category that should never be used. This may change once the new site design is implemented but for now, DO NOT USE IT. I know it’s redundant but be sure to include the Category Name in your Tags. This helps our Related Stories feature to work.
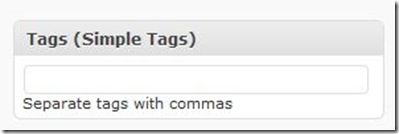
2. Use the Tags (Simple Tags) Box to insert Tags, this box also gives you suggested tags, before you make up a new Tag, see if it’s already in our Database. Eventually I want to use the tags to create “Big News Pages,” and Specials, so it’s going to be important that stories are properly tagged.
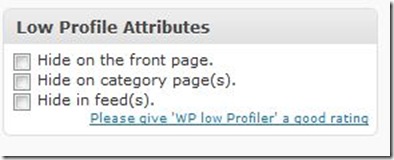
3. Low Profiler – The Low Profiler box is used to hide stories from the Home Page. Not every story or blurb should go on the front page – I’m relying on you all to use your best judgment on this. To make your Post appear on the Category Page, but not the Home Page – click the “Hide on the front page” check Box.
4. Publish Article Box – You are now ready to Publish the Article. To publish an article on a timer, click the Edit button next to the Publish immediately item. A calendar will appear, select the date and time you would like the story to run. This is a good feature to use to write an story in advance but have it automatically go live after an embargo period. To make an article stay at the top of the site (Sticky Post) click the Edit button next to the Visibility item. You will see an option called Stick Post, select it and the article will remain the top article until you manually uncheck it. (Do not use this function unless you ask first.).
Click the Publish button and you are done.
V. Add Video
You need to be in HTML view in order to Add Video to the website. To do this, on the Post page, click the HTML button, located on the top right of the Formatting Bar.
This will open the HTML view in your editor Window. Move the cursor to where you want to insert your HTML, Embed Code. Paste the code there, then click the Visual Tab, next to the HTML tab. This will bring you back to the Visual mode. If it worked you should see either a place holder spot for your video, or the video itself.
VI. Add Flickr Images
You can add images from your Flickr Library by simply clicking the Flickr Icon. The upload procedures are the same as for regular Image uploading, except it’ll pull the Image directly from your Flickr Account.


